✨本文提供了一套完整的基于Docker的目标检测研究环境搭建思路,对官方教程进行了一定的修改和补充。同时随文提供SSH和Jupyter server实践,均为可用状态,提供了可靠资料给小伙伴们探索。
注:官方docker适合运行框架内的模型,本文的修改的docker适合对模型进行修改和创新,对使用者的要求略高。
全流程
1 | 1. 下载需要的资源 |
官方文档:MMDetection3D
一. 下载需要的资源
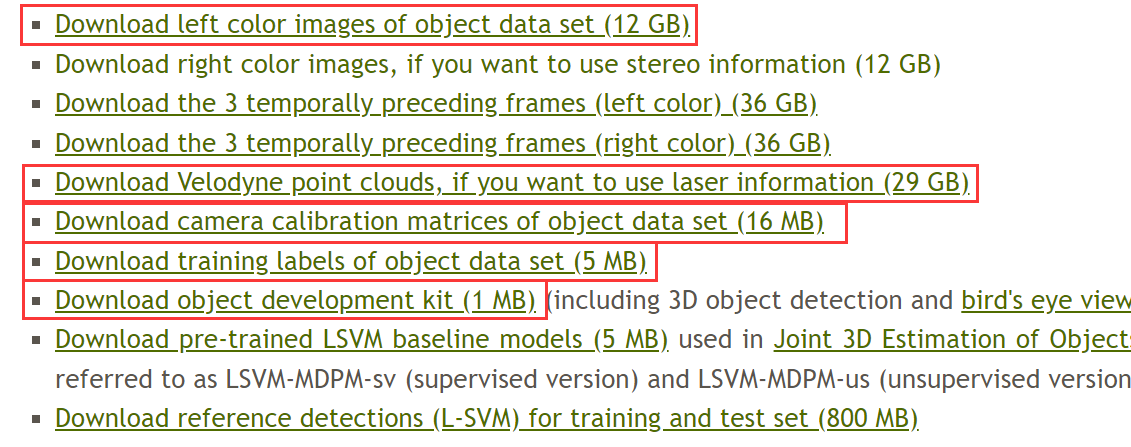
1. 下载 Kitti 数据集
官方网址:3D Object Detection Evaluation 2017。
参见博文:KITTI数据集下载及解析,内附百度云盘链接。
2. 下载 MMDetection3D 代码

官方代码仓库:https://github.com/open-mmlab/mmdetection3d
使用 git 下载:
1 | git clone https://github.com/open-mmlab/mmdetection3d.git |
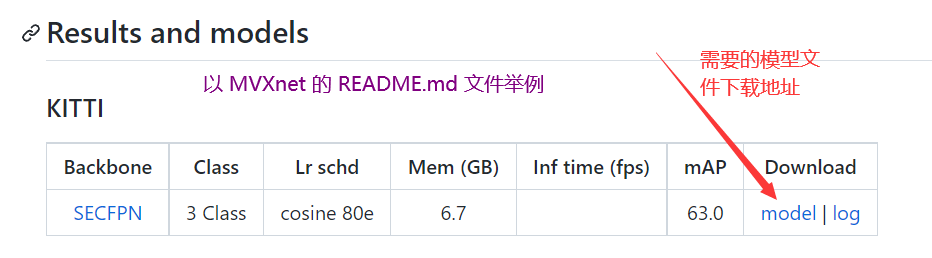
3. 下载需要的模型参数
在 mmdetection3d/configs/ 文件夹内找需要的模型,模型文件夹内的 README.md 内有模型参数下载链接。
二. 制作开发环境
1. 按说明将预训练模型参数和数据放到相应路径下
a. 模型预训练参数
将下载好的 .pth 文件放到 mmdetection3d/checkpoints 文件夹下。
b. 数据集
官方对数据集预处理的文档:3D 目标检测 KITTI 数据集,流程如下:
解压所有 Kitti 数据集,并将文件按如下方式组织:
1 | mmdetection3d |
2. 编辑 Dockerfile
官方提供的 Dockerfile 依然会有问题,因为我们进入 Dockerfile 进行一些修改。Dockerfile 的路径是 mmdetection3d/docker/Dockerfile。
先放最终 Dockerfile 修改版本:
1 | ARG PYTORCH="1.6.0" |
在 mmdetection3d/docker/ 文件夹中新建 sources.list 文件,文件内容如下:
1 | # 清华源 |
a. 硬件驱动版本
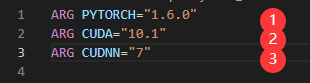
根据平台的硬件配置,到 Nvidia 官网寻找合适的 cuda 和 cudnn 的版本,然后到 Pytorch 的官网确定 Pytorch 的版本号。不需要下载到本地,按照修改下面的位置为对应的版本即可。
b. 软件依赖版本

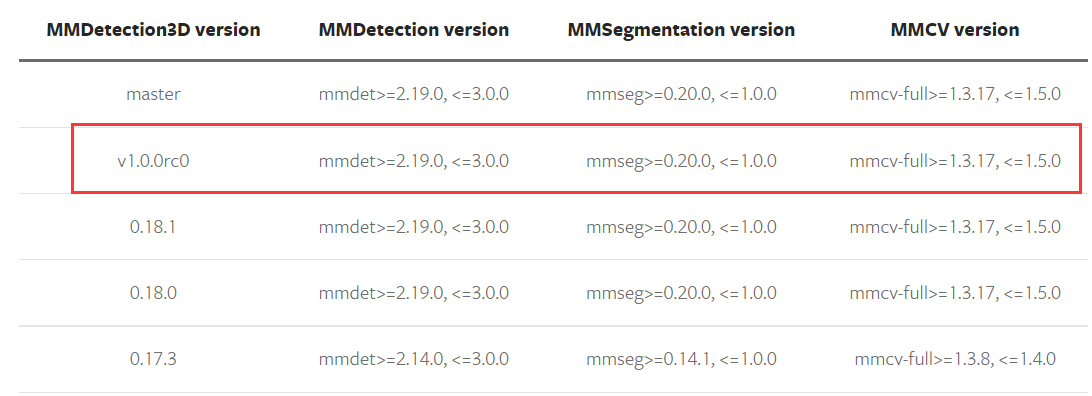
原先在 Dockerfile 中提供的版本号稍微陈旧了些,按照原版制作出来的环境会有很多的报错,所以我们根据 官方给出的版本号配置 进行修改。
修改如下:
1 | RUN pip install "mmcv-full>=1.3.17, <=1.5.0" -f https://download.openmmlab.com/mmcv/dist/cu101/torch1.6.0/index.html |
需要注意的是 mmcv-full 对不同的 cuda 和 pytorch 的版本有对应的支持,因此必须添加 -f 参数,参数链接的格式为:https://download.openmmlab.com/mmcv/dist/cu<版本号>/torch<版本号>/index.html,例如:https://download.openmmlab.com/mmcv/dist/cu101/torch1.6.0/index.html。
c. 修改国内镜像源
参考:用Dockerfile创建一个具有ssh服务的基础Ubuntu镜像
参考:ubuntu20.04换清华源后不能更新、https更新失败
d. 安装 ssh 并添加 ssh 配置命令
同参考:用Dockerfile创建一个具有ssh服务的基础Ubuntu镜像
3. 制作 Docker 镜像
在 mmdetection3d/ 目录下执行:
1 | docker build -t mmdetection3d docker/ |
因为 Docker 的默认镜像源在国外,速度堪忧,所以需要换源。有需要的小伙伴可以参考以下链接进行操作,这里就不展开说明了。
- Docker Desktop 修改国内镜像:Docker 国内镜像
- Docker 配置国内镜像源不起作用解决办法:修改dns(114.114.114.114) 。参考:docker 配置国内镜像源不起作用
4. 创建 Docker 容器
基于生成的镜像创建名为 mm3d docker 容器:
1 | docker run --name mm3d --gpus all --shm-size=8g -p 2022:22 -v <到 mmdetection3d 的绝对路径>:/mmdetection3d -it -d mmdetection3d |
这里,我们设置了端口映射和文件映射,宿主机端口 2022映射 Docker 内部端口 22 ,宿主机文件夹 mmdetection3d 映射Docker 内部文件夹 mmdetection3d。接下来我们就可是使用端口 2022 与 Docker ssh 通信,并可以同步 Docker 和宿主机 mmdetection3d 文件夹内的变化。
需要注意的是,一旦这里的文件夹的映射关系确定了,宿主机的文件夹的路径就不要变了。
三. 开始使用
启动我们的容器:docker start mm3d。
在容器中启动一个终端:docker exec -it mm3d bash。
在 mmdetection3d 目录下执行:pip install -v -e . 安装 mmdet3d。
最后保存我们镜像:docker commit mm3d mmdetection3d:full
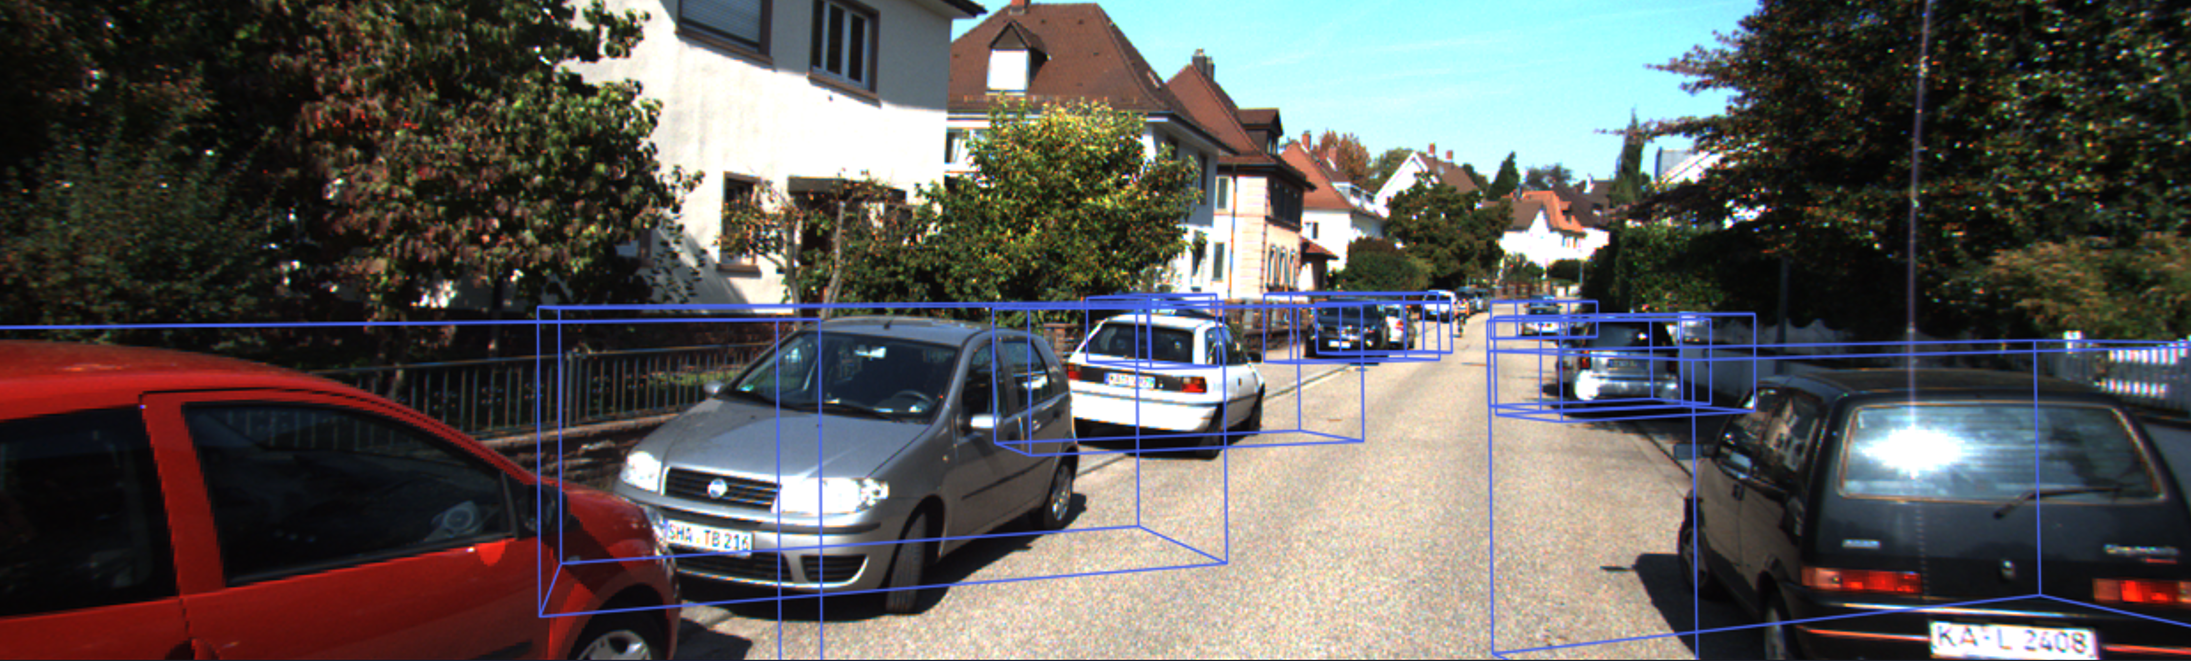
示例:使用预训练 MVXNET 模型进行多模态目标检测。
1 | python |
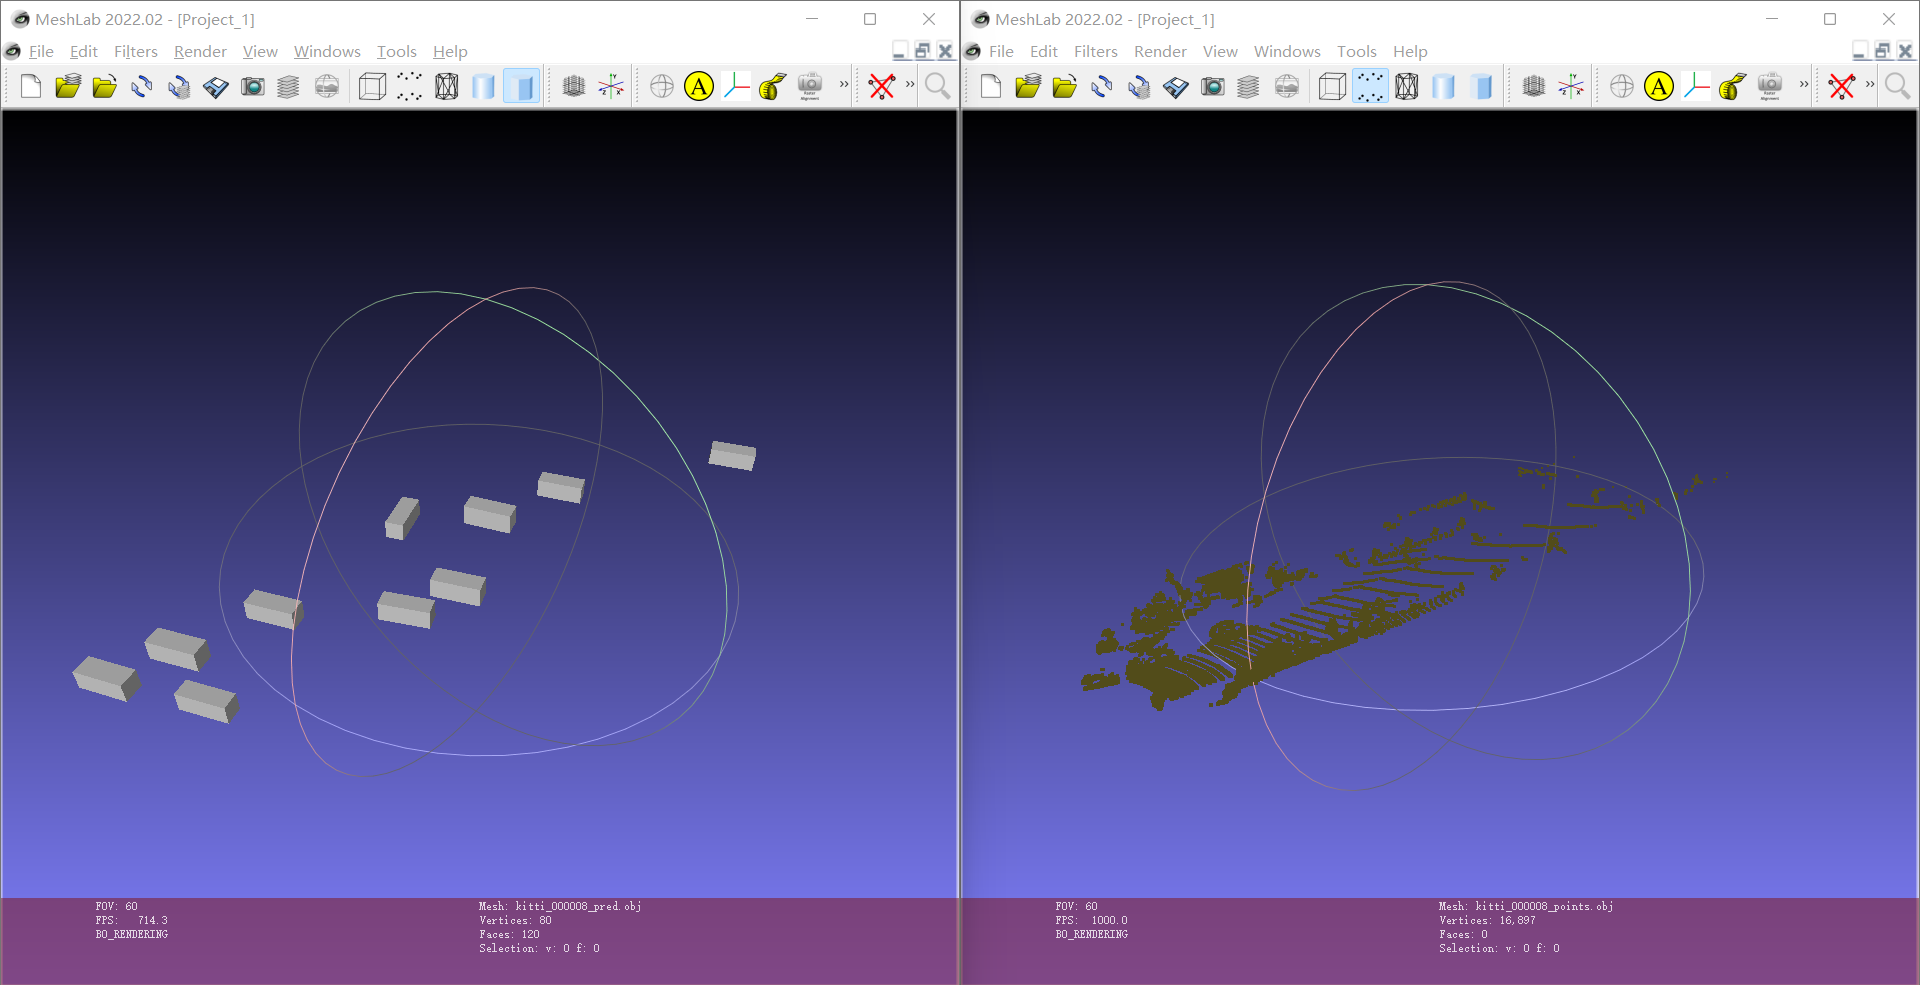
预测结果在 mmdetection3d\assets\kitti_000008 文件夹中,结果如图:
可以使用 Meshlab 查看3维点云图像。结果如图:
补充
接下来就是准备数据集了,使用如下代码对数据集进行处理:
2
3
4
5
6
7
8
9
# Download data split
wget -c https://raw.githubusercontent.com/traveller59/second.pytorch/master/second/data/ImageSets/test.txt --no-check-certificate --content-disposition -O ./data/kitti/ImageSets/test.txt
wget -c https://raw.githubusercontent.com/traveller59/second.pytorch/master/second/data/ImageSets/train.txt --no-check-certificate --content-disposition -O ./data/kitti/ImageSets/train.txt
wget -c https://raw.githubusercontent.com/traveller59/second.pytorch/master/second/data/ImageSets/val.txt --no-check-certificate --content-disposition -O ./data/kitti/ImageSets/val.txt
wget -c https://raw.githubusercontent.com/traveller59/second.pytorch/master/second/data/ImageSets/trainval.txt --no-check-certificate --content-disposition -O ./data/kitti/ImageSets/trainval.txt
python tools/create_data.py kitti --root-path ./data/kitti --out-dir ./data/kitti --extra-tag kitti
接下来是可选内容,参考:Docker – jupyter notebook使用方法
2
3
4
5
6
7
8
9
10
11
12
apt update
# 卸载jupyter
pip uninstall jupyter
# 安装 jupyter lab:
pip install jupyterlab
# 安装vim编辑器
apt install vim
# 生成 jupyter notebook 配置文件
jupyter notebook --generate-config
# 编辑配置文件
vim ~/.jupyter/jupyter_notebook_config.py修改以下内容,去掉注释格式。
2
3
4
c.NotebookApp.default_url = '/lab'
c.NotebookApp.ip = '*'
c.NotebookApp.open_browser = False直接在容器中启动 jupyter lab:
docker exec -it jupyter lab
注:因为没有设置密码,所以需要从终端给出的带 token 的链接打开。
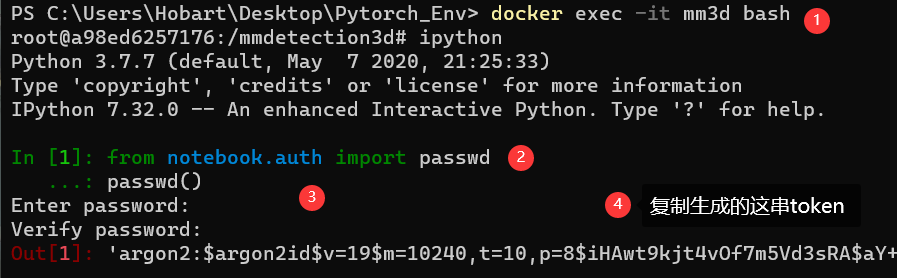
在添加jupyter密码时使用。在命令行里输入ipyton,再输入:
2
passwd()输完之后,设定一个密码,会生成一个秘钥,结果如下: